 Pin This
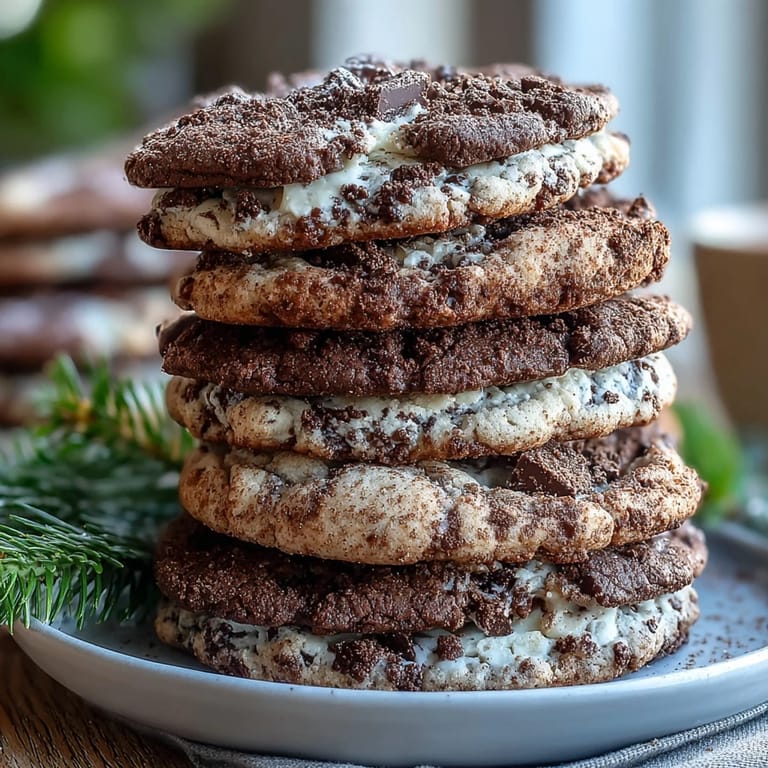
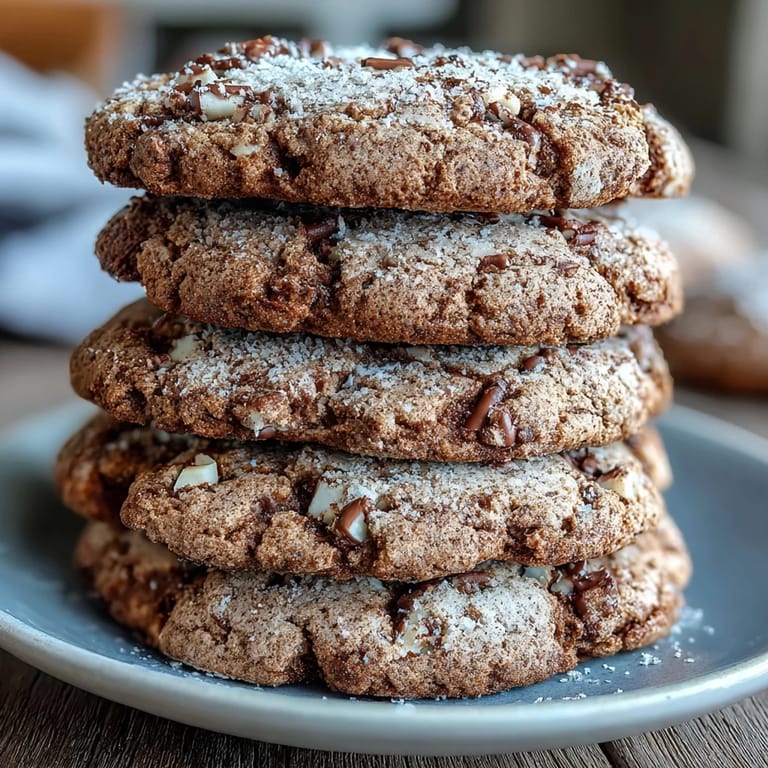
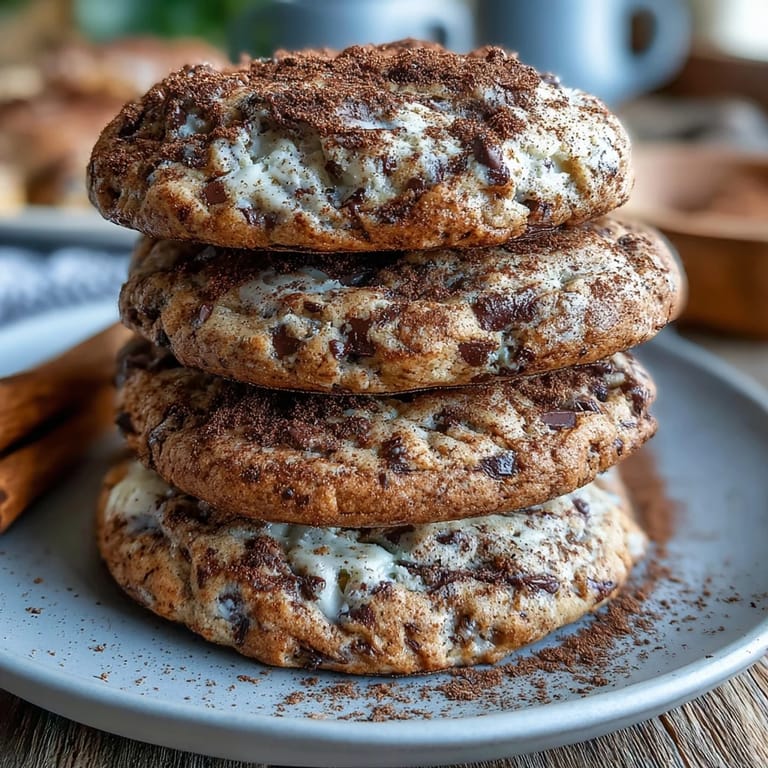
 The first time I encountered hojicha was at a tiny Japanese tea house where the owner served it alongside a simple butter cookie. The roasted, earthy notes of the tea danced so beautifully with the sweet crumb that I knew I had to recreate that magic at home. Now these cookies have become my go-to when I want something that feels sophisticated but still comforts like a classic treat.
Last winter, I brought a batch to a book club meeting and watched as my friend Sarah took a bite, closed her eyes, and immediately demanded the recipe. Theres something about the way the earthy tea and creamy white chocolate melt together that turns an ordinary afternoon into something special.
Ingredients
- All-purpose flour: The backbone that gives these cookies their tender crumb and structure
- Hojicha powder: This roasted Japanese green tea is the star, bringing those nutty, caramel notes that make these unforgettable
- Baking soda: Just enough to give the cookies a gentle rise and perfect texture
- Salt: A pinch that wakes up all the flavors and keeps the sweetness from becoming cloying
- Unsalted butter: Softened to room temperature so it creams beautifully with the sugars
- Granulated sugar: Creates crisp edges while the centers stay wonderfully soft
- Light brown sugar: Adds subtle caramel notes and helps keep the cookies moist
- Egg: Binds everything together while contributing to the chewy texture
- Vanilla extract: Rounds out the flavors and complements both the tea and chocolate
- White chocolate chips: The perfect creamy counterpart to hojichas roasted character
Tired of Takeout? 🥡
Get 10 meals you can make faster than delivery arrives. Seriously.
One email. No spam. Unsubscribe anytime.
Instructions
- Preheat your oven:
- Set it to 175°C (350°F) and line two baking sheets with parchment paper so nothing sticks and cleanup is effortless
- Whisk the dry ingredients:
- In a medium bowl, combine the flour, hojicha powder, baking soda, and salt until everything is evenly distributed
- Cream the butter and sugars:
- Beat the softened butter with both sugars in a large bowl for about 2 minutes until the mixture turns pale and fluffy
- Add the egg and vanilla:
- Beat them in until fully incorporated, watching the mixture become smooth and glossy
- Combine wet and dry:
- Gradually add the dry ingredients to the wet mixture, mixing only until you no longer see streaks of flour
- Fold in the white chocolate:
- Gently incorporate the chips so theyre evenly distributed without overworking the dough
- Scoop the dough:
- Drop tablespoon-sized mounds onto the prepared sheets, leaving about 5 cm (2 inches) between each for spreading
- Bake to perfection:
- Bake for 10–12 minutes until the edges are set but the centers still look slightly soft
- Cool patiently:
- Let the cookies rest on the baking sheet for 5 minutes before moving them to a wire rack to finish cooling
 Pin This
 My daughter now requests these for every school bake sale because, as she puts it, they taste like fancy bakery cookies but are actually so simple to make. Watching her classmates eyes light up at that first unique bite never gets old.
Getting the Texture Right
The key to these cookies is pulling them from the oven when they still look slightly underdone in the center. They continue cooking on the hot baking sheet, which is how you achieve that perfect combination of crisp edges and tender, chewy middles that makes them irresistible.
Choosing Your Hojicha
Not all hojicha powders are created equal. Look for one thats deeply aromatic with a reddish-brown color, which indicates a proper roast. A high-quality powder will give your cookies that distinctive toasted flavor that sets them apart from ordinary tea cookies.
Make-Ahead Secrets
The dough actually benefits from chilling in the refrigerator for up to 24 hours before baking. This rest period lets the flour hydrate and the flavors deepen, resulting in cookies with better texture and more complex taste.
- Scoop the dough balls and freeze them on a tray before transferring to a bag for fresh baked cookies anytime
- For extra hojicha flavor, sprinkle a pinch of powder on top of each dough mound before baking
- These cookies stay fresh in an airtight container for up to 4 days, though they rarely last that long
 Pin This
 There is something deeply satisfying about serving a cookie that surprises people with its sophistication while still delivering that classic comfort they crave. Happy baking.
Recipe FAQ
- → What does hojicha taste like in these cookies?
Hojicha brings a deep, roasted flavor with earthy notes and subtle caramel undertones. It's less grassy than matcha and more similar to a mild coffee or roasted nut flavor. The white chocolate balances this with creamy sweetness.
- → Can I use matcha powder instead of hojicha?
Yes, though the flavor profile will change significantly. Matcha is more grassy and vibrant, while hojicha is roasted and mellow. If substituting, use the same amount but expect a brighter, more vegetal taste.
- → Why do the centers look slightly soft after baking?
The centers continue cooking as they cool on the baking sheet. This method ensures chewy, tender cookies rather than crisp ones. Removing them when slightly underbaked guarantees the perfect texture.
- → How should I store these cookies?
Keep them in an airtight container at room temperature for up to 4 days. The hojicha flavor actually develops and becomes more pronounced after the first day. Layer with parchment paper to prevent sticking.
- → Can I freeze the dough?
Absolutely. Scoop the dough into balls, freeze on a baking sheet until solid, then transfer to a freezer bag. Bake from frozen, adding 1-2 minutes to the baking time. This way you can enjoy fresh cookies anytime.
- → What's the best way to measure the flour?
For consistent results, use a kitchen scale to weigh 200g of flour. If using cups, fluff the flour first, spoon it gently into the measuring cup, then level off with a knife without packing it down.