 Pin This
 My mom always said pavlova was her secret weapon for impressing guests, though the truth was far simpler—she just loved watching people's faces when they bit into that crispy shell and discovered the marshmallow softness inside. Years later, I found myself standing in my own kitchen on a humid Tuesday afternoon, determined to crack the code of this elegant dessert, armed with nothing but her handwritten note that read "beat egg whites until your arm gets tired, then beat some more." That Mother's Day, I finally understood what she meant, and this pavlova became my way of saying thank you for all those quiet kitchen lessons.
I made this for my partner's birthday last spring, and they nearly cried when I brought it to the table—not because it was perfect, but because it wobbled slightly as I walked and they realized I'd actually made something so delicate with my own two hands. The kitchen smelled like vanilla and caramelized sugar, and for those few hours while the pavlova cooled, I had an excuse to sit down with a coffee and do nothing but wait. That's when it hit me that pavlova isn't really about impressing anyone; it's about giving yourself permission to make something beautiful for people you love.
Ingredients
- Egg whites (4 large, room temperature): Cold eggs won't whip properly, so I always leave mine on the counter for 20 minutes while I gather everything else—this small step makes a real difference in how quickly they reach stiff peaks.
- Superfine sugar (1 cup / 200 g): Regular sugar works, but superfine dissolves so smoothly into the egg whites that you get that glossy, glass-like finish that makes people think you're a baking wizard.
- Cornstarch (1 tsp): This tiny amount is what keeps the center soft and marshmallow-like while the outside gets wonderfully crisp—don't skip it thinking it won't matter.
- White vinegar (1 tsp): It sounds odd, but it stabilizes the meringue and adds a subtle tang that balances the sweetness beautifully.
- Pure vanilla extract (1 tsp): Use real vanilla, not imitation—you'll taste the difference in every bite.
- Salt (pinch): Even a tiny pinch brings out the vanilla and makes the whole thing taste more sophisticated.
- Heavy whipping cream (1 cup / 240 ml, chilled): Cold cream whips into clouds in half the time, and I learned the hard way that room-temperature cream just sits there looking sad.
- Powdered sugar (2 tbsp for cream, plus extra for dusting): It dissolves instantly into whipped cream unlike granulated sugar, which can make the texture grainy.
- Mixed berries (4 cups total): Choose berries that are ripe but still firm—overripe ones weep juice all over the pavlova and make it soggy, though honestly that's still delicious, just messier.
- Fresh mint leaves (1 tbsp, optional): A few leaves add a brightness that makes people wonder what the mysterious fresh flavor is.
Tired of Takeout? 🥡
Get 10 meals you can make faster than delivery arrives. Seriously.
One email. No spam. Unsubscribe anytime.
Instructions
- Set up your stage:
- Preheat your oven to 250°F (120°C) and line a baking sheet with parchment paper, then trace a 9-inch circle on it—this becomes your guide for shaping, and it takes the guesswork out of making it look intentional rather than accidental.
- Prepare your bowl:
- Use a completely clean, dry mixing bowl for your egg whites because even a tiny drop of yolk or moisture will sabotage everything—I once used a bowl that still had a hint of oil residue and watched in horror as my whites refused to whip. Wipe it with vinegar on a paper towel if you're being extra cautious, which honestly, I always am.
- Whip the whites:
- Beat the egg whites with a pinch of salt until they form soft peaks that curl over when you lift the beaters—this usually takes about 2–3 minutes. Listen for the sound to change from a loose splashing to a airy hiss; that's when you know you're getting there.
- Add sugar gradually:
- Add the superfine sugar one tablespoon at a time while continuing to beat, which takes patience but ensures each bit dissolves completely and the meringue becomes glossy and thick. If you dump it all in at once, you'll end up with gritty meringue that never quite reaches that silky texture.
- Fold in the magic trio:
- Gently fold in the cornstarch, vinegar, and vanilla using a spatula with a light hand—you're preserving all that air you just beat in. I think of it as tucking them in rather than stirring, and that mindset keeps me from overmixing.
- Shape your nest:
- Spoon the meringue onto the parchment circle and use the back of a spoon to create a slight well in the center and raise the edges up a bit, like you're making a nest—don't stress about making it perfect because rustic edges are actually more charming. I usually go for bumpy and organic rather than trying to smooth it out into something sterile.
- The long bake:
- Bake for 1 hour 15 minutes at that low, gentle heat—the pavlova should turn pale cream-colored, not browned, and stay completely dry. Turn off the oven and crack the door open just slightly, then let it sit there while it cools completely, which helps prevent it from cracking as the temperature drops.
- Whip the cream:
- While the pavlova cools, pour your chilled heavy cream into a bowl and beat it with powdered sugar and vanilla until soft peaks form—you want it to hold its shape but still look cloud-like and soft. This usually takes about 2–3 minutes with a hand mixer, and the moment you reach soft peaks is the moment to stop, or you'll end up with something closer to butter.
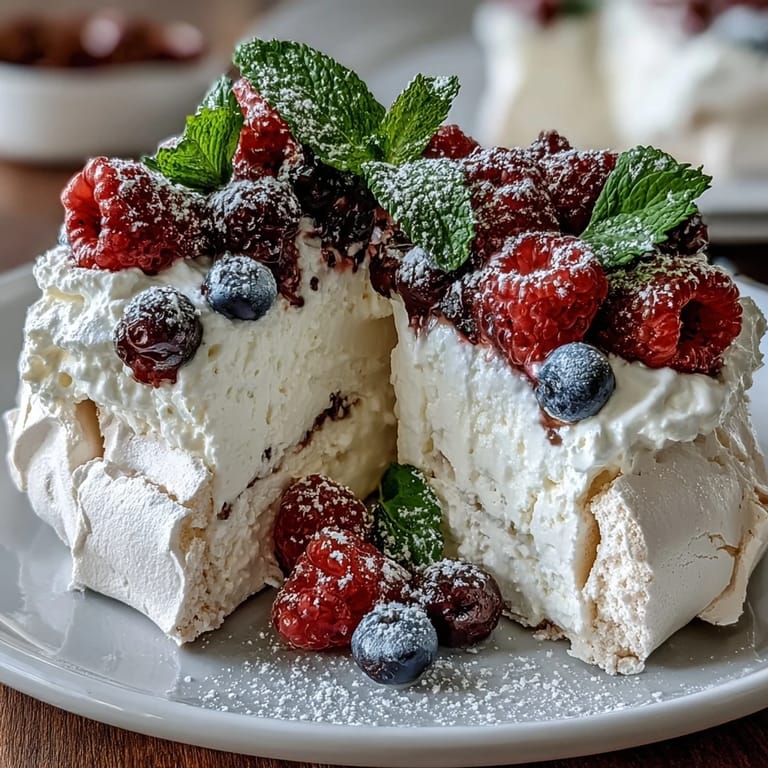
- Assemble with care:
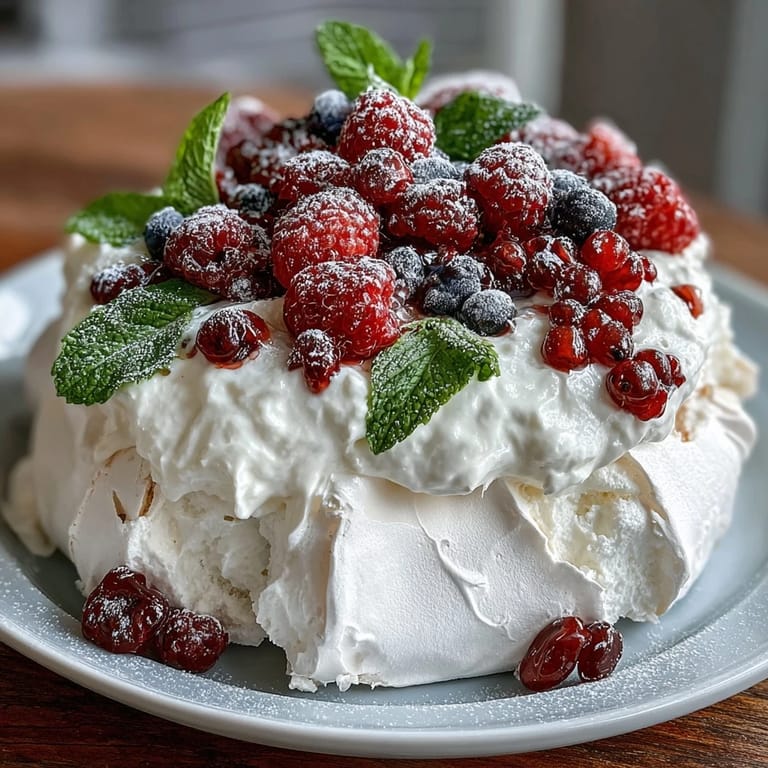
- Once the meringue is completely cool, carefully transfer it to a serving platter, then top with a generous dollop of whipped cream and arrange your berries in whatever way feels right to you. I usually pile them a bit higher on one side so it looks abundant and lived-in rather than symmetrical.
- The final flourish:
- Dust lightly with powdered sugar just before serving if you like, scatter a few mint leaves across the top, and take a moment to admire what you've made before anyone else gets their hands on it.
 Pin This
 There's a moment right after you serve pavlova when someone takes their first bite and their eyes go wide, and that's what this dessert is really about—creating that small miracle of texture and flavor and showing someone they're worth making something special for. My mom would be proud.
Why Pavlova Is Worth the Wait
Pavlova teaches you patience in a way other desserts don't, because most of the work is done in the first ten minutes, and the rest is just time and heat doing their thing while you step away from the kitchen. There's something freeing about that—you can't rush it, so you might as well stop trying. The oven becomes your timer, and you become someone with permission to sit down.
Playing with Berries and Seasons
The beauty of pavlova is that you're not locked into any particular berry situation—strawberries and raspberries are my go-to because they're reliable and beautiful, but I've made this with peaches and passionfruit in the summer, with blackberries and blueberries in the fall, and even with pomegranate arils and kiwi when I wanted something different. The meringue is the star, and the berries are just there to catch the light and add freshness.
Kitchen Moments and Small Victories
The first time you make pavlova successfully is genuinely thrilling—there's no fancy equipment required, no expensive ingredients, just technique and attention and the willingness to trust the process. I remember feeling almost invincible when mine came out of the oven perfectly crisp, like I'd unlocked some secret knowledge that had been hiding in plain sight. Every pavlova after that one felt like repeating a small victory, and now I make them without thinking, which somehow makes them feel even more special.
- If you're nervous about the meringue, remember that even slightly imperfect pavlovas taste exactly as good as perfect ones—nobody cares about the shape once they taste it.
- Make sure your berries are as cold as your cream if you want everything to stay fresh and bright for as long as possible.
- This dessert is forgiving in almost every way except humidity, so check your local weather before you commit to baking day.
 Pin This
 This pavlova is the dessert I reach for when I want to say "I love you" without actually saying those words out loud—it's celebratory and elegant and surprisingly forgiving once you understand its quirks. Make this for your mom, make it for your best friend, make it for yourself on a day when you deserve something beautiful.
Recipe FAQ
- → How is the pavlova texture achieved?
By beating egg whites to stiff peaks and baking at a low temperature, a crisp exterior forms while the inside remains soft and marshmallow-like.
- → Can I substitute the mixed berries?
Yes, seasonal fruits such as kiwi, peaches, or passionfruit work well to provide fresh, vibrant flavors.
- → What causes meringue to become sticky?
High humidity can prevent the meringue from drying properly, leading to stickiness. Baking on dry days is recommended.
- → How should the pavlova be cooled?
Allow the pavlova to cool inside the turned-off oven with the door slightly ajar to maintain structure and avoid collapsing.
- → Are there any allergen considerations?
This dish contains eggs and dairy from cream. It's gluten-free, but checking labels for traces in ingredients is advised.
- → Can I add a chocolate flavor?
Yes, folding in sifted cocoa powder before baking creates a chocolate variation with a rich twist.