 Pin This
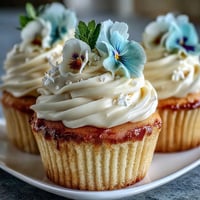
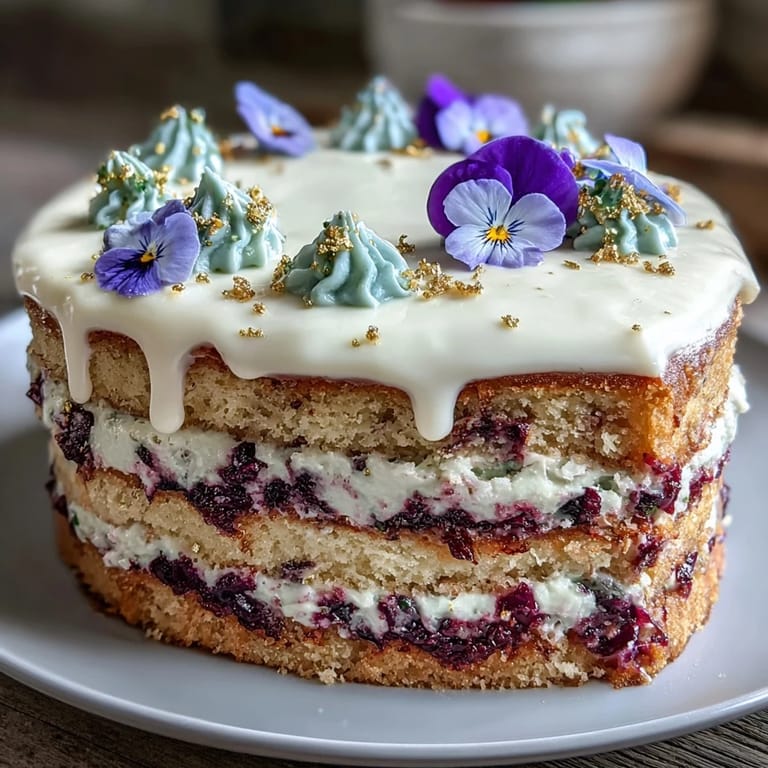
 My hands were shaking slightly as I piped the final swirl of buttercream onto what would become my friend's graduation cake. She'd spent four years grinding through organic chemistry and late-night study sessions, and somehow it felt right that this cake needed to be as elegant and intentional as her achievement. The idea came to me while admiring a florist's window display—what if I could capture that same delicate beauty on cake, adding glimmers of gold leaf that caught the light like possibility itself? That afternoon, I learned that celebration cakes don't have to be complicated; they just need to feel like someone cared enough to try.
I'll never forget watching my friend's parents see that cake for the first time at her graduation dinner. Her mom actually teared up, not just at the cake itself but at the gesture of it—the time spent, the deliberateness, the way those delicate pansies seemed to honor what she'd accomplished. That's when I realized this isn't just a recipe; it's a love letter in buttercream and flowers. Since then, I've made versions for promotions, anniversaries, and celebrations I needed to make feel truly special.
Ingredients
- All-purpose flour (2 1/2 cups): The backbone of a tender crumb; whisking it with baking powder prevents dense pockets and ensures even rise.
- Baking powder (2 1/2 tsp): Double-check the expiration date on this because old baking powder is the sneaky reason cakes stay flat.
- Salt (1/2 tsp): A tiny pinch that amplifies vanilla flavor and balances sweetness so the cake doesn't taste one-dimensional.
- Unsalted butter (1 cup plus 1 1/2 cups for buttercream): Room temperature is non-negotiable; cold butter won't cream properly, and your cake will be heavy.
- Granulated sugar (2 cups for cake, 1 1/4 cups for buttercream): The creaming process with butter incorporates air, which is what makes this cake light and tender.
- Large eggs (4, plus 5 more for buttercream): Room temperature eggs emulsify smoothly into the batter, preventing lumps and ensuring tender crumb.
- Vanilla extract (1 tbsp for cake, 2 tsp for buttercream): Use real vanilla; imitation won't give you that sophisticated flavor depth this cake deserves.
- Whole milk (1 cup): Alternating wet and dry ingredients keeps gluten development minimal, which keeps the cake tender and delicate.
- Edible flowers (pansies, violets, roses): Source these from specialty grocers or online suppliers that guarantee they're pesticide-free and food-safe.
- Edible gold leaf sheets: These are frighteningly delicate and prone to sticking to your fingers, but that moment when you place them on the cake is pure magic.
Tired of Takeout? 🥡
Get 10 meals you can make faster than delivery arrives. Seriously.
One email. No spam. Unsubscribe anytime.
Instructions
- Prepare Your Pans:
- Preheat the oven to 350°F and grease three 8-inch round pans with a light coating of butter or baking spray, then line the bottoms with parchment paper. This ensures your cake releases cleanly without sticking to the sides.
- Combine Dry Ingredients:
- Whisk flour, baking powder, and salt together in a small bowl and set it aside. This pre-mixing distributes the leavening evenly so you won't have pockets of underbaked batter.
- Cream Butter and Sugar:
- Beat softened butter and sugar together for about 3 minutes until it's pale, fluffy, and looks like wet sand. You're essentially incorporating tiny air bubbles that will help the cake rise and stay tender.
- Add Eggs One by One:
- Add each egg individually, beating well after each addition and scraping down the bowl, then mix in vanilla extract. Adding eggs slowly prevents the batter from breaking and ensures a uniform, smooth texture.
- Alternate Wet and Dry:
- Start with a portion of the flour mixture, then add some milk, then more flour, alternating until everything is incorporated and mixing just until combined. Overmixing develops gluten and makes the cake tough, so stop as soon as you don't see any flour streaks.
- Fill the Pans:
- Divide the batter evenly among the three prepared pans and smooth the tops so they bake evenly. A small offset spatula or the back of a spoon works beautifully for this.
- Bake Until Golden:
- Bake for 28 to 32 minutes until a toothpick inserted in the center comes out clean and the tops are set and lightly golden. The smell at around 25 minutes will test your patience, but resist opening the oven door.
- Cool Properly:
- Let the cakes rest in their pans for 10 minutes so the structure sets, then turn them out onto wire racks to cool completely. Trying to handle warm cake is asking for crumbs and tears.
- Make the Swiss Meringue Buttercream:
- Whisk egg whites and sugar together in a heatproof bowl over simmering water, whisking constantly until the mixture reaches 160°F and the sugar has completely dissolved, about 5 minutes. This step pasteurizes the eggs and is essential for food safety.
- Whip to Stiff Peaks:
- Transfer the warm mixture to a stand mixer and beat on high speed for 8 to 10 minutes until stiff peaks form and the bowl feels cool to the touch. This is where the magic happens—the mixture becomes glossy and triple in volume.
- Incorporate Butter Gradually:
- Reduce the mixer to medium speed and add butter a few cubes at a time, mixing until each addition is incorporated and the buttercream is smooth and creamy. If it looks curdled at any point, keep mixing; it will come together.
- Season and Finish:
- Add vanilla extract and a pinch of salt, mixing until just combined. These final touches deepen the vanilla flavor without making the buttercream taste overly sweet.
- Assemble the Cake:
- Place the first cooled cake layer on your serving plate, spread a generous layer of buttercream on top, then repeat with the second layer and buttercream, and finally place the third layer on top. Work slowly and use an offset spatula to keep layers level.
- Crumb Coat and Chill:
- Apply a very thin, even layer of buttercream over the entire cake to seal in any loose crumbs, then refrigerate for 20 minutes. This ensures your final frosting layer looks pristine and professional.
- Apply Final Frosting:
- Add a final, thicker layer of buttercream, using an offset spatula to create smooth sides or gentle swirls, depending on your style. This is where your cake's personality shows through.
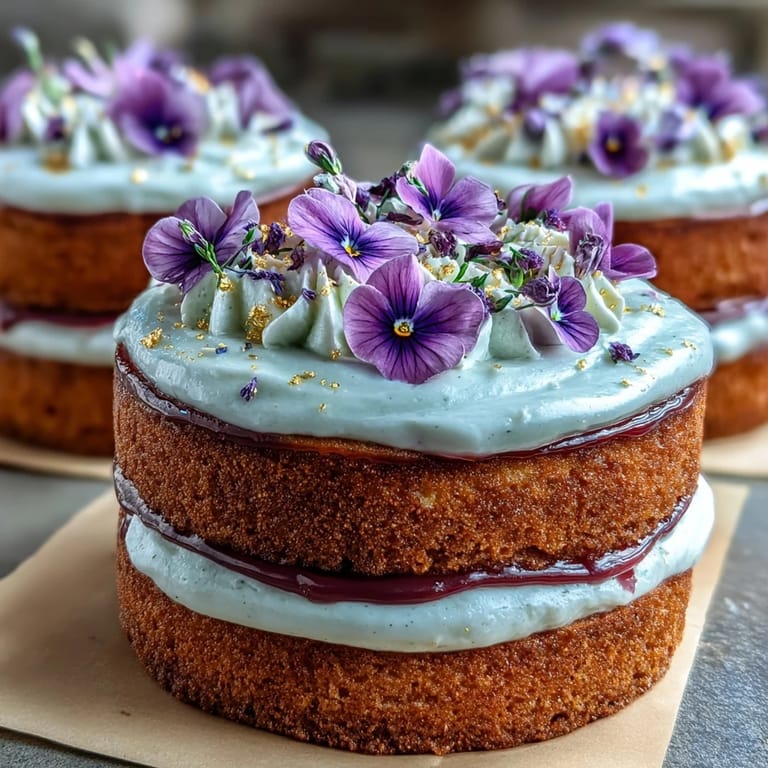
- Apply Gold Leaf:
- Using a food-safe paintbrush, gently touch the delicate gold leaf sheets and carefully press them onto sections of the cake in a scattered pattern. Gold leaf clings easily to buttercream, so work slowly and let it adhere naturally.
- Arrange Edible Flowers:
- Position your edible flowers strategically around the cake, tucking some into frosting swirls and placing others in loose clusters. Step back frequently to see how the design is developing.
- Add Final Touches:
- Wrap a gold ribbon around the base of the cake if desired, securing it gently with a small dab of buttercream on the back. This polished detail frames the cake and ties everything together.
 Pin This
 The most moving moment came months later when my friend texted me a photo from her office—a printout of that graduation cake photo framed on her desk. She said it reminded her that people believe in her, and that small kindnesses like a thoughtfully decorated cake stick with you longer than you'd expect. That's what makes this cake worth the effort.
Why Room Temperature Matters
I learned this the hard way after pulling eggs and butter straight from the fridge for an early morning baking session. The resulting cake was dense and slightly greasy, teaching me that room temperature ingredients genuinely emulsify better and create a lighter, more tender crumb. Now I set everything out the night before or give myself an extra 30 minutes in the morning to let things warm up naturally on the counter.
Sourcing Edible Flowers Safely
The first time I attempted to decorate with flowers, I grabbed some pansies from a local garden center without thinking twice. A friend who works in catering gently pointed out that most ornamental flowers are treated with pesticides and fungicides not meant for consumption. Now I only source from specialty food suppliers, farmers markets with certified edible flower vendors, or online retailers that provide documentation.
Timing and Flexibility
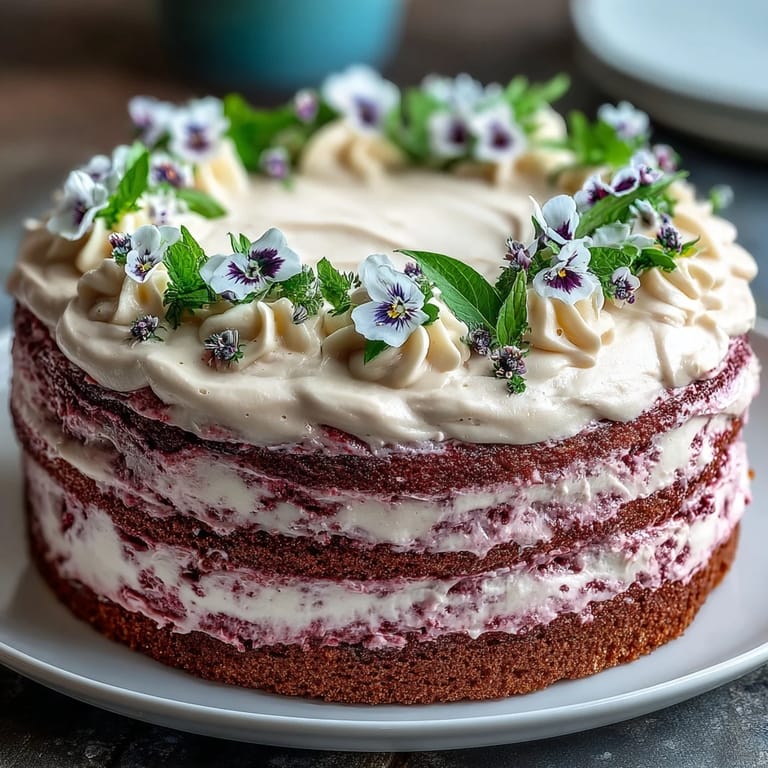
One of my favorite aspects of this cake is how forgiving the timeline can be, which matters when you're baking for a specific celebration. The vanilla sponge layers keep beautifully wrapped in plastic wrap for up to two days, the buttercream can be made a day ahead and gently re-whipped before use, and the decorating can happen hours before serving or even the morning of. You can also bake fewer layers and make it shorter, skip the gold leaf for a simpler look, or swap in different edible flowers based on what's available in your area.
- Make the cake layers up to two days ahead and store them wrapped tightly at room temperature or refrigerated.
- Prepare buttercream up to one day ahead and gently re-whip it on medium speed for a few minutes if it's been refrigerated.
- Decorate no more than four hours before serving to keep flowers fresh and gold leaf gleaming.
 Pin This
 Graduation cakes are about more than layers and frosting; they're about showing up for people during moments they'll remember forever. This recipe gives you the tools to do exactly that.
Recipe FAQ
- → What type of buttercream is used for this cake?
A silky Swiss meringue buttercream made by heating egg whites and sugar, then whipping with butter and vanilla for a smooth finish.
- → How are the edible flowers prepared for decoration?
Only pesticide-free, food-grade edible flowers like pansies, violets, and roses are used and arranged carefully on the cake after applying gold leaf.
- → Can the sponge be made chocolate-flavored?
Yes, by substituting half a cup of flour with cocoa powder, the vanilla sponge transforms into a chocolate version.
- → What tools are essential for assembling and decorating this cake?
Essential tools include round cake pans, electric mixer, mixing bowls, offset spatula, food-safe paintbrush, and wire racks for cooling.
- → How long does the entire process take including cooling?
Preparation takes about 45 minutes, baking 35 minutes, plus additional cooling and decorating time, totaling around 1 hour 20 minutes plus chilling.